
2026-09-14 ·
How To Flush Sediment From A Water Heater Tank
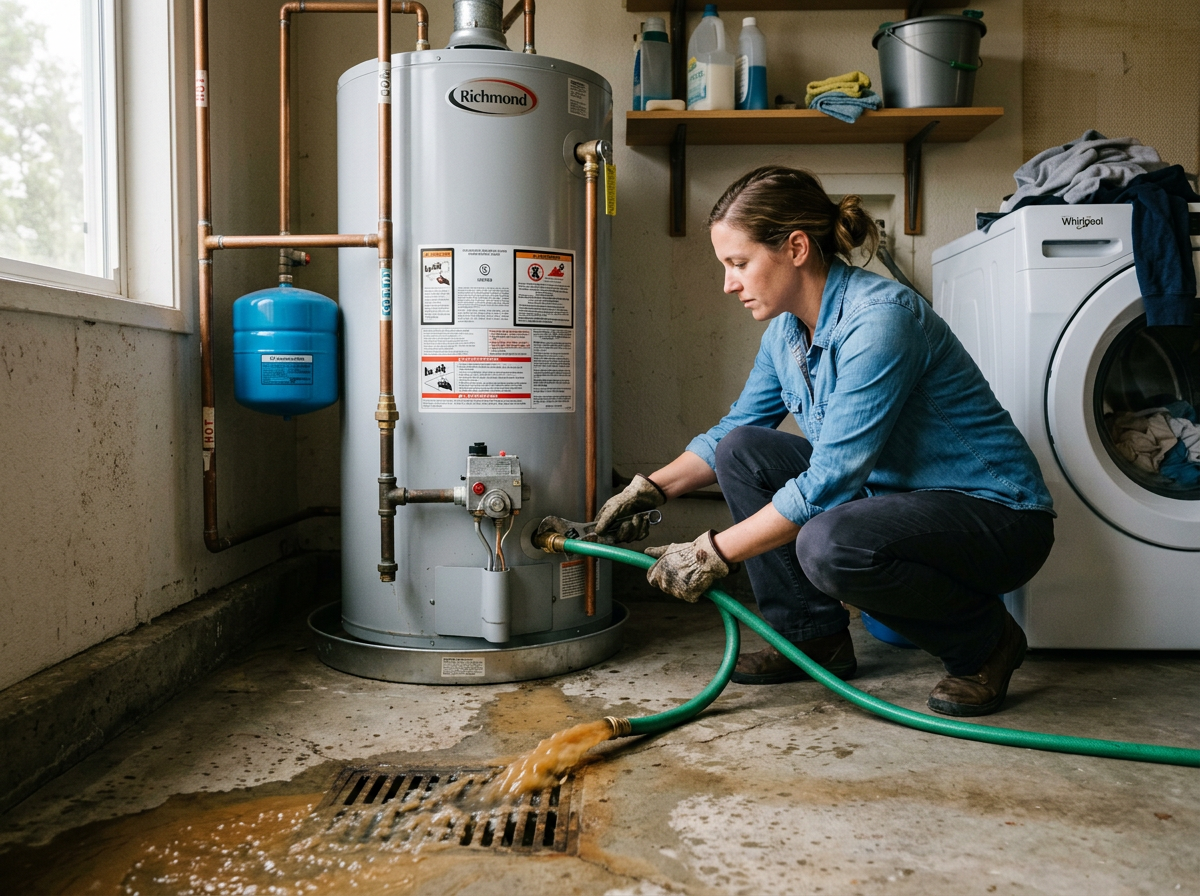
Flushing sediment from a water heater tank begins with shutting off power or gas, attaching a hose to the drain valve at the bottom, and draining until the water runs clear, typically requiring 15 to 30 minutes for a standard 40- or 50-gallon tank.
Understanding Sediment Buildup
Sediment collects from minerals in the water supply, especially in inland California areas where hard water accelerates the process compared to softer coastal supplies. In places like the foothills or desert regions, well water and higher mineral content lead to faster accumulation at the tank bottom. This layer insulates the heating element or burner, forcing the unit to work harder and potentially shortening the typical 8-12 year lifespan of a tank. Homeowners in Torrance notice reduced hot water output or strange noises when buildup reaches critical levels. Flushing every six months prevents these issues in hard water zones, while annual flushing may suffice near the coast. The process also helps maintain proper temperature settings without overheating the lower portion of the tank.
Tools and Safety Preparations
Gather a garden hose long enough to reach a safe drain point, a bucket for initial testing, gloves, and a flathead screwdriver to open the drain valve if needed. Turn off the power at the breaker for electric models or the gas supply for gas units before starting. Locate the cold water inlet valve at the top and shut it off to stop incoming water. For units in garages, confirm the 18-inch elevation rule keeps the burner above potential flood levels during the flush. Wear eye protection because hot water may discharge under pressure. Check the temperature and pressure relief valve briefly to ensure it operates freely, as sediment can affect its function over time. These steps apply equally to both gas and electric water heaters found throughout the South Bay.
Step-by-Step Flushing Process
Connect the hose securely to the drain valve and run the other end outside or to a floor drain. Open the valve slowly to release pressure, then fully drain several gallons until the flow appears mostly clear of rust or grit. Close the valve, refill the tank by opening the cold water inlet, and repeat the drain cycle two or three times if heavy sediment appears. After the final refill, restore power or gas and purge air from the hot water faucets throughout the house. Monitor the first few gallons from a nearby tap to confirm temperature recovery. In areas with propane or well water, such as backcountry locations, extra cycles may be necessary due to higher mineral loads. This routine keeps the tank interior cleaner without requiring specialized equipment.
When Flushing Indicates Further Service
If water remains discolored after multiple cycles or the tank fails to recover temperature quickly, sediment may have damaged internal components. Persistent issues often point to the need for professional inspection rather than repeated homeowner flushing. Water heater repair addresses valves or heating elements affected by long-term buildup. For electric models, electric water heater service can evaluate element condition directly. Readers facing no hot water after flushing can review troubleshooting no hot water issues in Torrance homes for additional diagnostic steps. Regular maintenance like this reduces emergency calls in homes across Torrance and nearby communities.